

One thing his office was lacking was a nice office chair. I debated getting him a big leather one but when I had the opportunity to inherit an old office chair from my Granny's house I took it and decided to give him something more unique. Here is how I did it:
Supplies:
- Office chair of choice
- 3 yards Marvel fabric
- 1 yard black fabric
- Staple gun
- Sewing machine
- Seam ripper
- Staple remover
- Pliers
- Screwdriver
- Black paint
- Polyurethane
- Plaster of Paris
Directions:
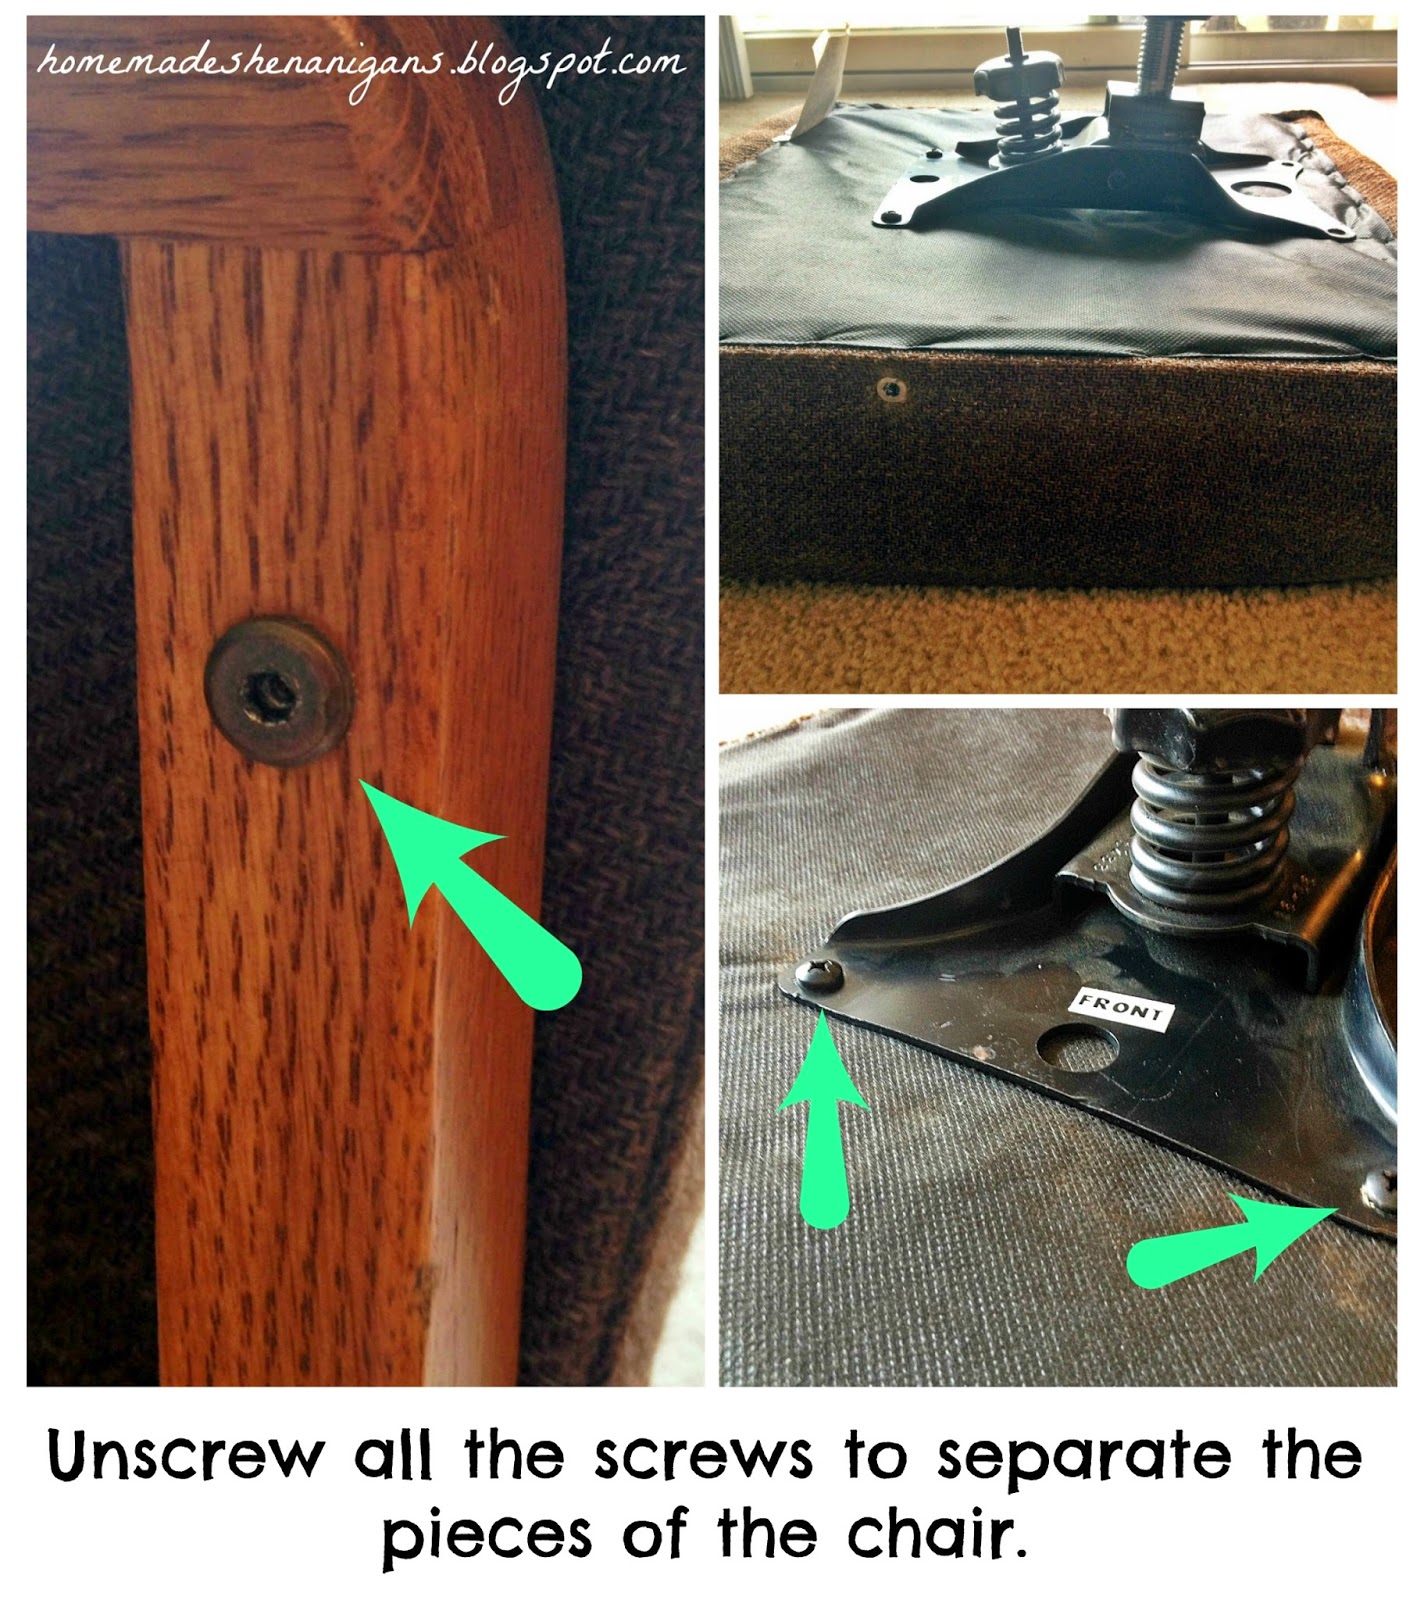
- First, you will need to disassemble the chair. Unscrew the arms and set aside. Also, unscrew the bottom rolling portion. You should now have two separate cushions (the back portion and the part you sit on).
- Take the fabric off of the chair by pulling all of the staples out. Use a seam ripper to detach the pieces from each other. These will be used as the pattern pieces for the new fabric.
- The back of this chair had a nail strip attaching the fabric to the back so be careful and remove this part and set aside.
- Lay out the fabric and use old fabric as pattern pieces. The black fabric will be on the sides and the Marvel fabric will be the main portion of each cushion. Cut out your fabric.

- Next, place the fabric on the cushions right side down.
- Pin the pieces together so that you form a new cover for each cushion. You want it to be somewhat tight so that the fabric will be taut once it is all stapled down.
- Remove new fabric cover from cushion and sew along where you have pined it.

- Flip inside out and place over cushion. Pull fabric taut and staple to the wood underneath. You will be reattaching everything like it was when you took the old fabric off the chair originally.
- The next part that needs to be done is painting the wood parts. I decided to use chalk paint so that I would not have to sand everything before-hand. Mix 1/3 cup plaster of Paris, 1/3 cup water, and 1 cup paint. Paint all surfaces and let dry in-between coats. I ended up doing three coats to make sure everything was covered.
- Once it is dry, cover with a coat of polyurethane. I did not use wax because I wanted it to have more of a shine and have a smoother finish. I only did one coat but you can do several if you want more protection.
- When everything is done drying you can reattach the cushions and start using your brand-new, one of a kind chair!

I love how it looks in my boyfriend's office and he has already been sitting in it. It is much better than a folding chair and fits his personality perfectly! What kinds of personalized items have you made recently? Hope you enjoy and let me know what you all think!
No comments:
Post a Comment