Showing posts with label Sewing Projects. Show all posts

Tuesday, July 8, 2014

Superhero Desk Chair

My boyfriend has a serious obsession with superheros and Marvel comics is displayed everywhere in his office. Artwork he finds at comic cons line the walls and he has a fairly large collection of superhero figurines. One of his degrees is in film and he proudly shows this anywhere he can.


One thing his office was lacking was a nice office chair. I debated getting him a big leather one but when I had the opportunity to inherit an old office chair from my Granny's house I took it and decided to give him something more unique. Here is how I did it:

Supplies:
  • Office chair of choice
  • 3 yards Marvel fabric
  • 1 yard black fabric
  • Staple gun
  • Sewing machine
  • Seam ripper
  • Staple remover
  • Pliers
  • Screwdriver
  • Black paint
  • Polyurethane
  • Plaster of Paris
Directions:
  1. First, you will need to disassemble the chair. Unscrew the arms and set aside. Also, unscrew the bottom rolling portion. You should now have two separate cushions (the back portion and the part you sit on).
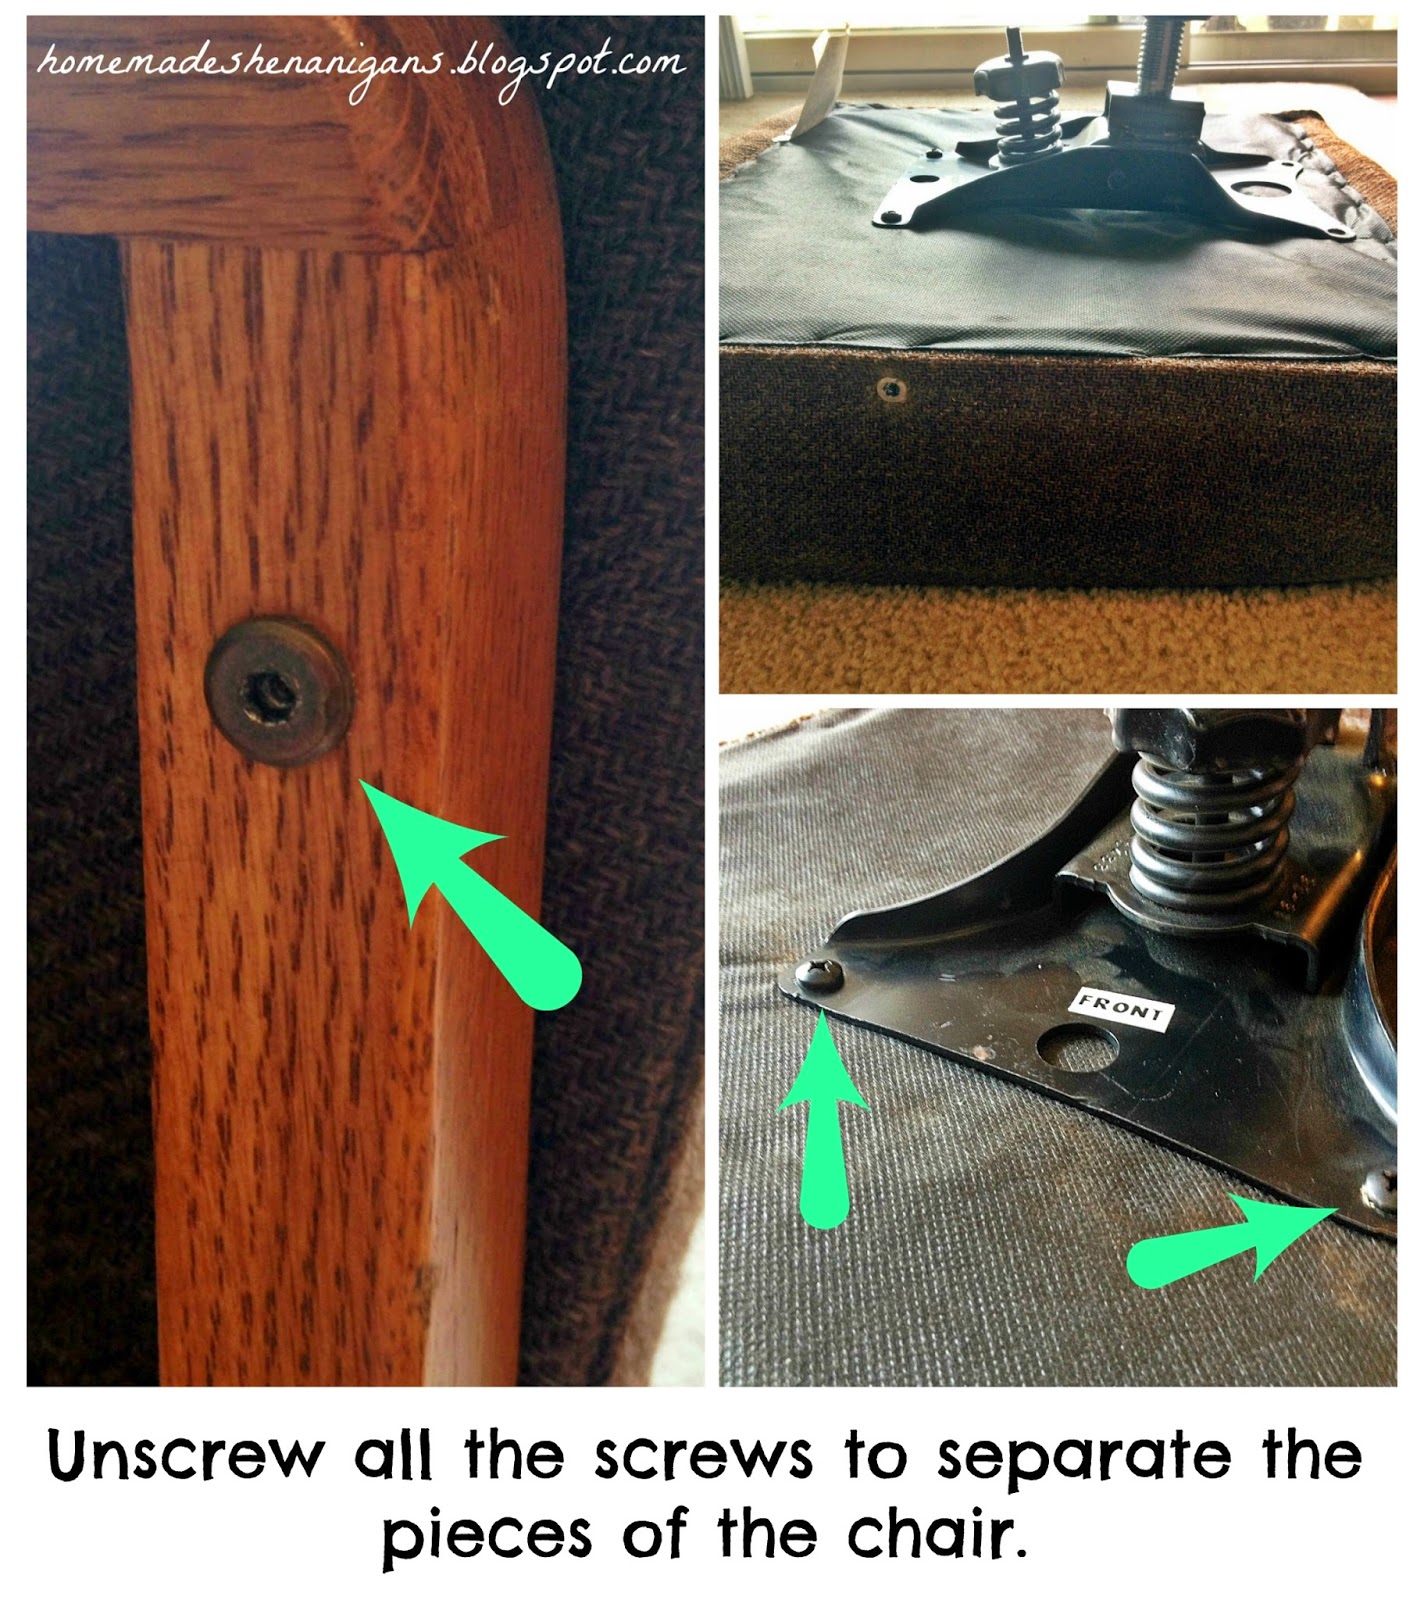
  2. Take the fabric off of the chair by pulling all of the staples out. Use a seam ripper to detach the pieces from each other. These will be used as the pattern pieces for the new fabric.
  3. The back of this chair had a nail strip attaching the fabric to the back so be careful and remove this part and set aside.
  4. Lay out the fabric and use old fabric as pattern pieces. The black fabric will be on the sides and the Marvel fabric will be the main portion of each cushion. Cut out your fabric.
  5. Next, place the fabric on the cushions right side down.
  6. Pin the pieces together so that you form a new cover for each cushion. You want it to be somewhat tight so that the fabric will be taut once it is all stapled down.
  7. Remove new fabric cover from cushion and sew along where you have pined it.
  8. Flip inside out and place over cushion. Pull fabric taut and staple to the wood underneath. You will be reattaching everything like it was when you took the old fabric off the chair originally.
  9. The next part that needs to be done is painting the wood parts. I decided to use chalk paint so that I would not have to sand everything before-hand. Mix 1/3 cup plaster of Paris, 1/3 cup water, and 1 cup paint. Paint all surfaces and let dry in-between coats. I ended up doing three coats to make sure everything was covered.
  10. Once it is dry, cover with a coat of polyurethane. I did not use wax because I wanted it to have more of a shine and have a smoother finish. I only did one coat but you can do several if you want more protection.
  11. When everything is done drying you can reattach the cushions and start using your brand-new, one of a kind chair!

I love how it looks in my boyfriend's office and he has already been sitting in it. It is much better than a folding chair and fits his personality perfectly! What kinds of personalized items have you made recently? Hope you enjoy and let me know what you all think!

Thursday, February 13, 2014

DIY Headband


I wear headbands all of the time. They are perfect for work and are a little more interesting than just throwing my hair up into a ponytail. Many of my old headbands have become stretched out and I have been in desperate need of some new ones. I have seen a few tutorials showing how to make fabric flowers and thought I could combine my love of flowers, diy, and headbands to create a usable work of art for my hair. 

Supplies:
  • Ribbon
  • 2 hair ties (without metal connectors)
  • Thread
  • Scrap fabric
  • 2 buttons or other embellishments
Directions:

  1. The first thing I did was to make the base of the headband. I started with the hair ties and the ribbon. To measure how much ribbon you will need hold it across your head so that it goes from ear to ear (like how you will wear the headband), then add about 1-2 inches. 
  2. Next tie your two hair ties together, pulling the knot tight.
  3. Sew the ribbon onto the hair ties by folding the ends over each side of the knotted hair ties.
  4. Next, work on the flowers for the headband. Take your scrap fabric and cut out 6 circles for each flower.
  5. Fold each circle in half and sew them together, overlapping each end, forming a chain.
  6. Once you sew the last circle of the chain connect it to the first circle to form the chain into a circle. 
  7. Pull the string at the end to cinch the "petals" together and tie.
  8. Once you have your flowers sew them to the ribbon headband where you want them.
  9. Next, take your buttons or other embellishments and sew them into the middle of each flower and your're done!

This project was simple and easy to make. I now have a custom headband to add to my collection. I originally got my idea and instructions for the flowers off Pinterest. I would add a link to the website but when clicking on the link it says it is now a bead store. I took pictures of what I did to help simplify the directions. Hope you guys find this tutorial useful and make your own awesome new headbands!

Linking Up To:
Cast Party Wednesday
Worthwhile Wednesdays

Monday, January 13, 2014

Stenciled Strength Pillow

After completing my other two pillows Drop Cloth Flower Pillow and Painted Love Pillow, I began work on a project inspired by Wit and Whistle. Her pillow with a quote stenciled on it was a brilliant idea. I decided that I did not want a quote but rather a word. I chose "strength" because it was a word you don't normally see on things and since I was moving to a new city and starting a new job, I thought it was fitting. I had already done a "Love" pillow so I thought a way to make it more unique would be to add more words. I did this by looking up strength in many different languages. I decided the translations would be the background and the English version would be the focal point.


Materials: 
  • 1/2 yard of drop cloth: Free
  • Paint: Free
  • Thread: Free
  • Paint brush: Free
  • Martha Stewart trace your own tracing paper: Free
  • Craft knife: Free
Directions: 
  1. Cut out three pieces from the drop cloth. One 19" x 21", one 19" x 17", and one 19" x 14".
  2. Make a word document with the image/words you want on your pillow. 
  3. Print it out. You may need to print it onto several pieces and then tape them together in order to be big enough for the pillow.
  4. Tape the pages onto the tracing paper and cut out the letters/image with the craft knife. 
  5. Once it is all cut out, take the backing off and place firmly onto the largest piece of drop cloth.
  6. Paint the pillow. I used leftover black house paint Peal off the stencil once dry.
  7. Assemble pillow based on picture bellow:

Total Cost: Free

Cost for all three pillows: $30.00

The pillow turned out very nice. All three pillows that I made from the drop cloth are now being displayed in the guest bedroom. They fit perfectly with the decor and really finish off the room. They aren't the most comfortable pillows to lay on but they work perfectly for decoration.


Drop Cloth Flower Pillow

If you haven't noticed by now, much of my inspiration comes from things I see on Pinterest. Last year when I was preparing to move to my very own apartment after graduating college, I decided to do a few DIY projects that could be used for decorations. Cluck Cluck Sew has a great tutorial and I love the pillow she made. This is where I got the idea for this project. However, I wanted to switch it up and use a more unconventional fabric so I decided on using a canvas drop cloth. It was cheap, durable, and had an interesting look. For the flower petals I used red felt. This fabric is a bit stiffer so it will better hold its shape, plus I had some leftover from a past project making it free.


Supplies: 
  • 1/4 yard felt: Free
  • 5ft x 4ft canvas drop cloth $6.00
  • 18" x 18" pillow form: $5.00
  • Scissors: Free
  • Thread: Free
Directions:
  1. First, you need to cut out the main pieces of the pillow. To do this cut three different sized rectangles from your drop cloth: one 19" x 19", one 19" x 15", and one 19" x 12". Next, cut out your petals by cutting your felt into 30 large circles (3in) and 20 small circles (2in). Then cut each of those circles in half.
  2. Take the largest piece of your drop cloth, this will be the front of the pillow where the petals will be sewed on. Draw a large circle on it, leaving about 5 inches around the edge. This will be your starting guide for the petals.
  3.  Line up the edge of the petals along the line and sew them in place as you go. Once you are about to meet up with the first petal you placed, start overlapping and work your way to the center in a spiral fashion. Once you get closer to the center, begin using the smaller sized petals.
  4. At the very end, cut out a small circle and sew it in the middle of your flower. 
  5. Next, you need to finish the pillow. In order to do this take the remaining two pieces of drop cloth and sew them to the piece with your flower on it to make a simple envelope pillow. Cluck Cluck Sew does a much better job explaining this entire process than I do and even has some great pictures.
Total Cost: $11.00

I was really happy with how my pillow turned out and I ended up making three different pillows using the drop cloth. To view those see Painted Love Pillow and Stenciled Strength Pillow.


Painted Love Pillow


This is the second pillow I made using the drop cloth I had purchased for my Drop Cloth Flower Pillow. I got the idea from Crazy Wonderful. Her's turned out so beautifully that I had to make one for myself. Mine ended up being only one sided though and I used the envelope style to close the pillow, instead of sewing it shut.


Supplies:

  • 1/2 yard of drop cloth: Free
  • Thread: Free
  • Paint: $2.00
  • Small paint brush: Free
  • 6" x 14" pillow form: $6.00
  • Martha Stewart trace your own adhesive tracing paper: $11.00
  • Craft knife: Free
  • Cutting mat: Free

Directions:
  1. First, cut out three pieces from the drop cloth. You will need one 11" x 21", one 11" x 17", and one 11" x 14". 
  2. Take the largest piece and place on a mat or piece of cardboard. This will be the part that is painted and you don't want the paint to bleed through onto a nice surface.
  3. Print out a word or phrase you want to use and trace it onto your tracing paper. Cut it out with your craft knife. Take off the backing and press it firmly onto the drop cloth.
  4. Paint your pillow.
  5. Peal off the stencil once dry.
  6. Sew the pieces together envelope style. Like the picture shows bellow. Flip inside out and place your pillow form inside.

Total Cost: $19.00

This was a simple pillow to make. It has looked great on my couch, on my chair, and on the guest bed. I will probably try making another one again soon.